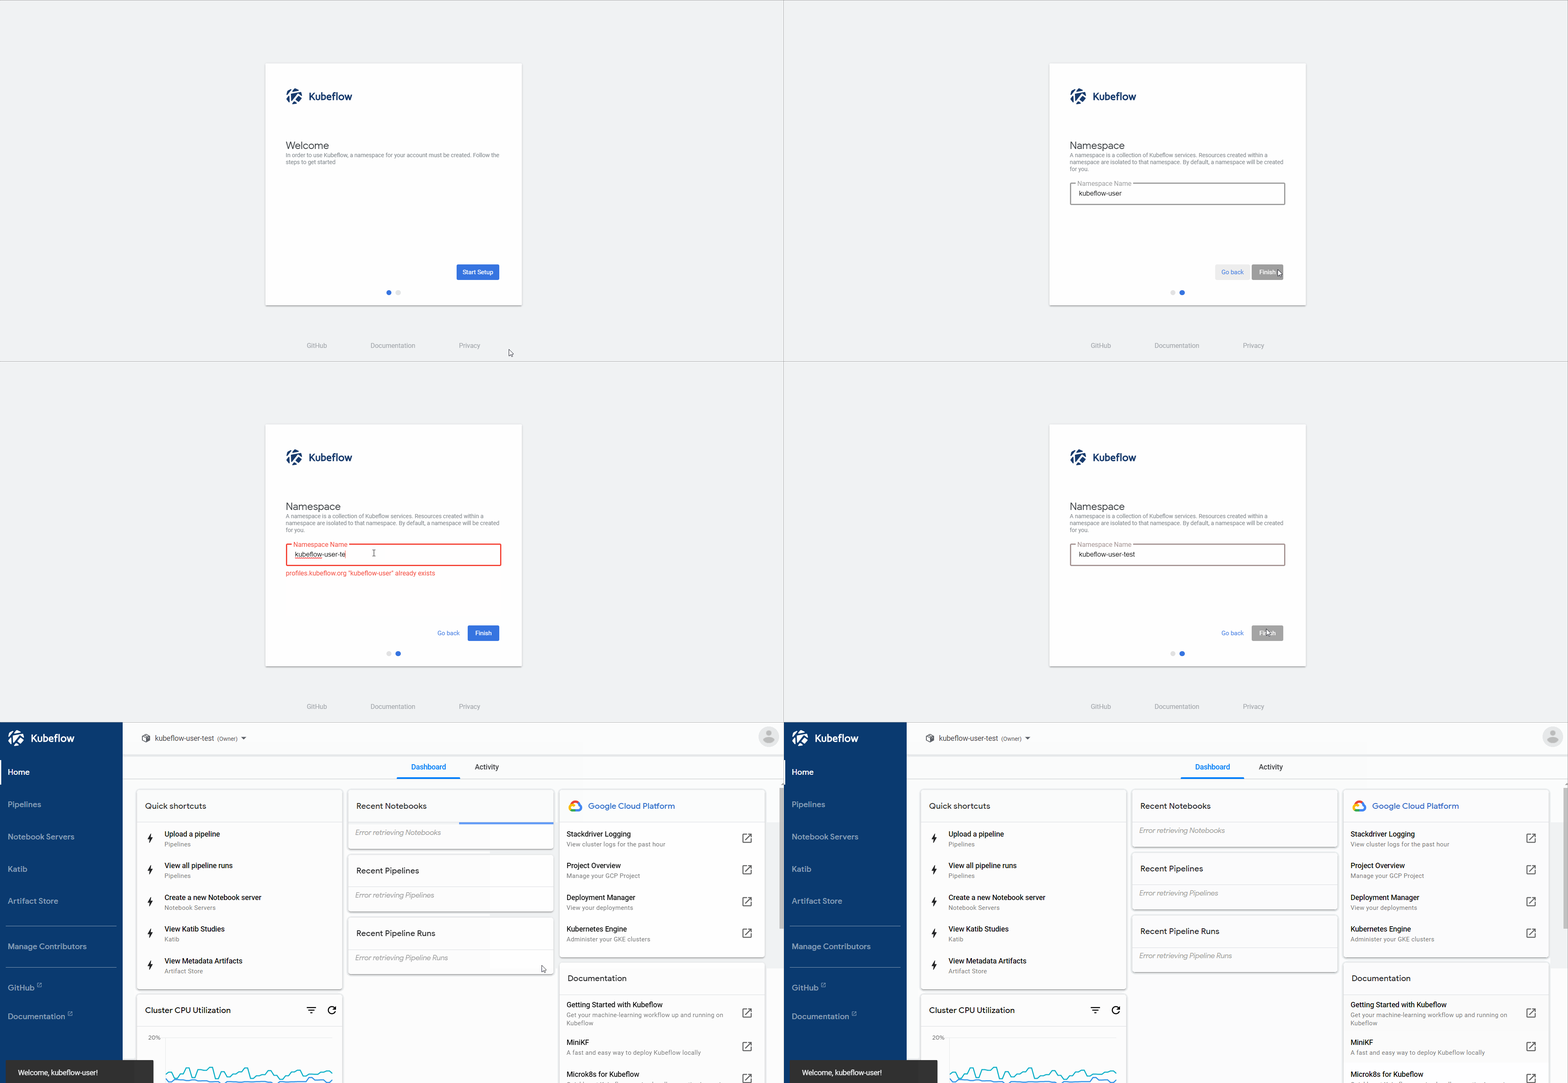
Registration Flow
The view that allows you to set up your first namespace in the cluster
Your Kubeflow deployment comes deployed with Kubeflow Central Dashboard.
This view will show when the cluster is:
- When in
multi-userisolation mode:- Your user has no profile (workgroup / namespace) role-bindings in which you’re
admin(Owner)
- Your user has no profile (workgroup / namespace) role-bindings in which you’re
- When in
single-userisolation mode:- The entire cluster has no profile (workgroup / namespace) role-bindings
This guide shows you what this view looks like and how the flow appears.
Quick guide
Summary of steps:
- Follow the Kubeflow getting-started guide to set up your Kubeflow deployment and open the Kubeflow UI.
- If the registration flow view shows up (because the conditions above are satisfied), follow the guide below, else your network should be good to use as is
Steps
- On page load the Registration View opens up
- This view will walk you through creating the first workgroup binding for your user or cluster (depending on
isolation-mode)
- This view will walk you through creating the first workgroup binding for your user or cluster (depending on
- Since you don’t have an owned namespace, we will create one
- IE. the user does not have
adminprofile/workgroup binding for a namespace
- IE. the user does not have
- A default name for your new namespace is auto-filled in the input box (the default name is your LDAP)
- LDAP for an email like
kubeflow-user@google.comwould bekubeflow-user - If there are errors on this step, like invalid name or namespace already exists, you will see an error and the input box will turn red, you can then try again
- LDAP for an email like
- Once you successfully create the namespace, you should be greeted the Kubeflow Dashboard overview page
Visual

Feedback
Was this page helpful?
Glad to hear it! Please tell us how we can improve.
Sorry to hear that. Please tell us how we can improve.
Last modified 22.01.2020: [CentralDashboard] Docs added for central-dashboard (#1538) (43269b0b)